Wednesday, August 17, 2016

Previous Builds: Revell 1/144 B747 Lufthansa

After the previous build, the next unfinished plane went on the line. It had sat on top of book shelf for some years until I picked it up in February. I had given up after a shoddy attempt at painting it white with a rattle can when it did not turn out well. I hoped to get a smooth white coat but instead ended up drops dripping down the sides of the fuselage; I guess I did not wait long enough between coats of paint.
I started the restoration by sanding off  the awful globs of paint and reapplied the panel lines with an Exact-o-knife. I could not keep the knife steady and ended up with some messy panel lines, something I will watch out for in the future
Using my new airbrush, I reapplied the white airliner paint, with the trademark blue Lufthansa vertical stabilizer.  I took matte black and coated the inside as you can see through the windows to prevent light leaking through. I additionally added the grey under belly.
The decals for this plane were one of the most tedious things I have ever done. For example. the ubiquitous "no step" markings were plentifully placed along the delicate panels on the wings. Furthermore there were no shortage of decals on the fuselage and engines for various valves ports and safety signs.
The metallic window frames of the cockpit window were made using short wires and glued into the shape of the windows.
With some light weathering along the bottom and engines I hanged the plane into the sky of my bedroom.


Wednesday, August 10, 2016

Previous models: Revell 1/72 F-22 Raptor

        Back in January I decided to revitalize my interest in scale models after a three year hiatus in the hobby. My guilt of letting this plane sit in a dusty shoe box was over come when I woke up one day and decided enough was enough.
        Scrambling to my drawers, I gathered my brushes, paints and unfinished models determined to reclaim them from the dark cabinets filled with bits of plastic and bugs. I hastily ran to my basement and set up shop on an old table. Paper bags covering the table surface and paints thrown to the back, slowly a sense of excitement returned; my hands tingled with suspense. Could I really be starting this once again?

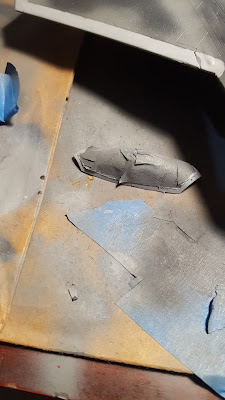
         I took the plane in my hand and glanced over the glossy plastic, desperately waiting to be covered in the matte grey camouflage it deserved. A long time ago I had only finished construction and now I must finish the job. I looked at the instructions, then back to the plane, back and fourth I slowly and careful planned out what to do next. The plane has camouflage, how do I paint that? I checked the internet on techniques and tricks of painting.
        This happened to be the first time I used an airbrush to paint. A tool that was some what foreign to me as all my previous models were hand brushed; all I knew was that the pros used them to get a smooth life like paint job. Little did I know that it would become one of my favorite tools. 
           After priming with Vallejo Base Grey, the first coat of light grey was put up onto the leading edges of all the flat edges. The F-22 raptor is a US fifth generation stealth tactical fighter. With stealth built in, the I knew model had to portray the various elements that define the plane in real life, most importantly the specialized stealth coating paint. To start, the leading edges are painted with special radar absorbing paints to prevent radar return from the most venerable areas. Additionally I attempted to replicate the metallic sheen that the real plane has on its body by mixing the grays with paint metal paints. I don't believe I replicated the effect as well as I could have, which is what I remedied on my more recent F-22 build. 
         Painting went pretty smoothly except for when a large drop of CA glue randomly dropped on to one of the wings. I almost gave up that day. All I could do was sand and repaint the section. 
After painting came time to decal up. I used to  dread sliding the many barely visible decals and hoping they wouldn't break.
          After another clear coat, came the last step, the weathering. The difference between perfection and the reality. In real life its impossible for anything to stay super clean, whether it be dust, grease, oil, you name it, it will be present everywhere. As a model maker it is the final touch to replicate the big world in the small world. Shadows, dust and grime are replicated with washes. I used watered down black paint which seeped into the panel lines to enhance the realism.
        As I look back through the eyes of experience I learned many mistakes and new skills that furthered my pursuit in making models as real as I can. This project gained me the knowledge and confidence that was needed to make a second F-22 where I correct the problems I encountered making this one. I will present the next F-22 will be in a future post. Enjoy!
-Patrick


Sunday, August 7, 2016

First post

Hello guys this is a blog where I will be show casing the scale models that I build, enjoy.
-Patrick Ma